

Building a seamless lead generation funnel shouldn’t require hiring a developer or wrestling with complex code.
If you are using Systeme.io to build your email list and sell digital products, getting those opt-in boxes onto your self-hosted site can feel frustrating.
Fortunately, learning how to embed Systeme io form on WordPress blog pages takes less than five minutes.
In this step-by-step guide, I will show you the exact copy-and-paste method.
Keep reading, and I’ll go through the exact 6 steps, 1 insider secret to capturing more leads, and 1 insider secret to instantly get more sales.
Step 1: Sign Up for a Free Systeme.io Account (No Credit Card Required)
Systeme io is an amazing platform.
It allows you to send an unlimited number of emails to your list for free, and you can create a free account here.
You might be wondering what the catch is?
With the free account your required to have a sticker for Systeme.io on your landing page, which is an affiliate link, and you can earn money.
Also, you are only allowed 1 automation.
Systeme.io Tier & Automation Limits
Select a plan tier below to compare contact limits, funnels, and automation capacity.
Step 2: How to Create an Opt-In Form in Systeme.io
Now that you have a free account, you want to create a form.
On the top menu, there is a button that says “sites”; it’s a drop-down menu. Then click on “sales funnel” and click on “create +” the large blue button.
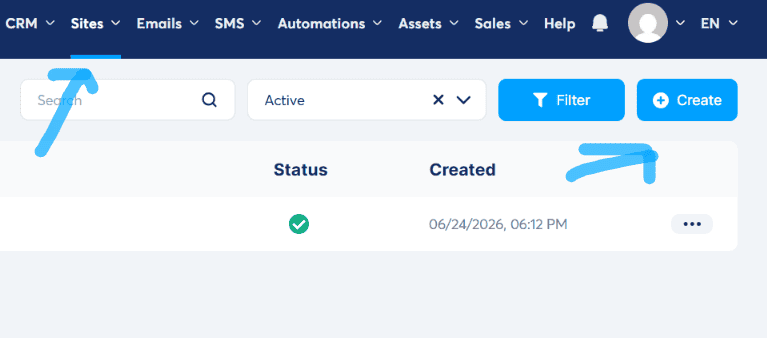
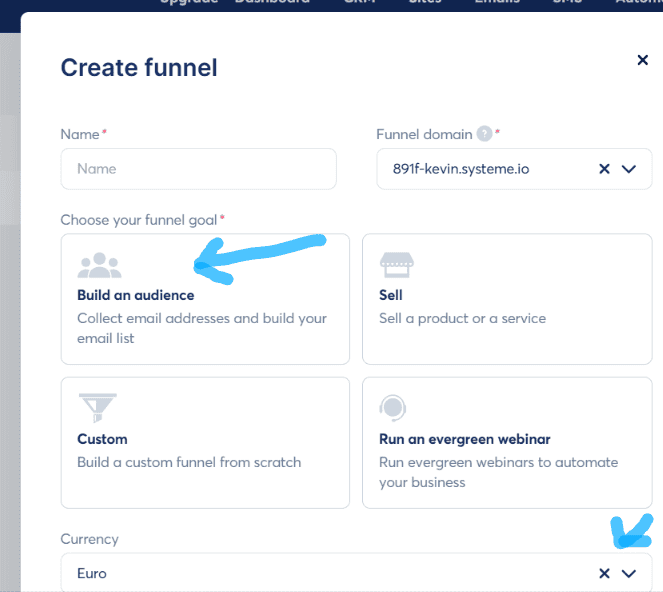
Now you enter a new menu where there are 4 options.
You want to choose “build an audience” and you can name the form anything you want. Also, it’s a good idea to change the currency to whatever you want.
Step 3: Choose a High-Converting Lead Capture Template
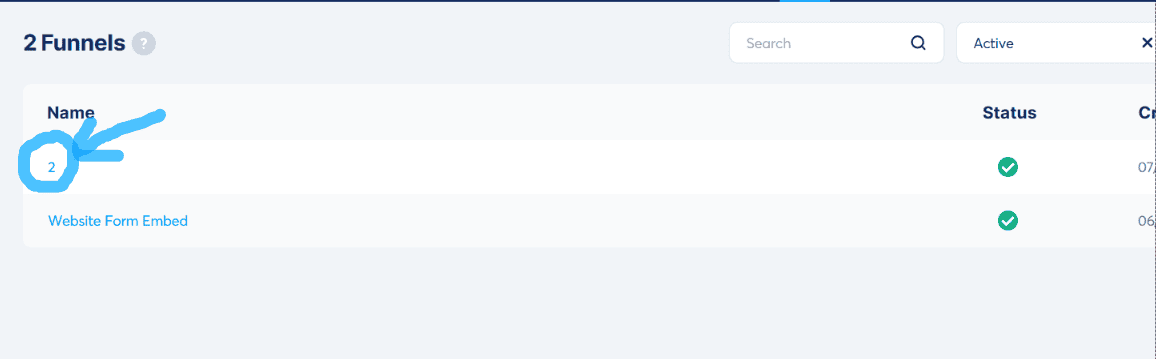
Now that you created it, you want to click on it in your main menu.
I named mine 2 (real creative right?), so I would click on the 2 button.
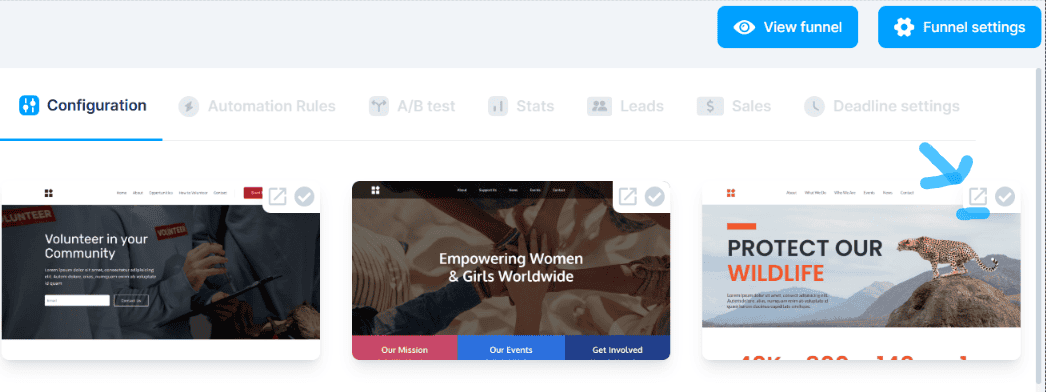
Now comes the challenging part of choosing a template.
Mine is VERY basic and simple, and that is what I recommend.
I choose one and deleted everything except the form. In the menu where you see all the templates.
There is a way to preview the template before choosing it.
Now that you have chosen a template.
On the left is a button that says “edit page.” Now you can delete, add videos, pictures, testimonials, or anything you want.
You can even delete everything to make it simple like mine.
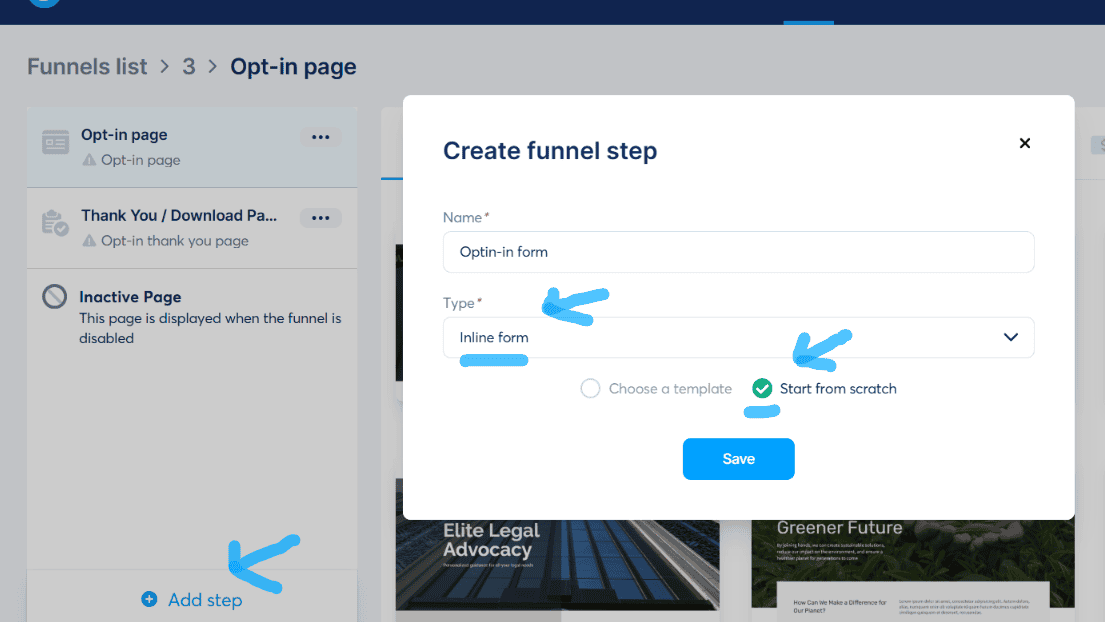
A secret trick: if you want just a blank template, on the left click on “add a step.”
Then name the step, for type choose “inline form,” and make sure you check “start from scratch.”
Step 4: Customize Your Form Inputs to Capture Email Leads
They have an opt-in form, but I found it is more difficult to embed on WordPress. The Inline form has the script, so it’s much easier.
Now you have a blank page. On the left, scroll down until you see the “form input” and click on it.
You will see where someone can enter their info to opt in.
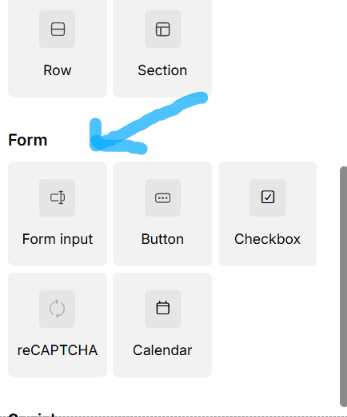
Now you created the form input, where someone can enter their email. You are still missing the button.
You have to add the button, which is directly next to the “form input” and I put mine below the “form input” where someone can enter their email.
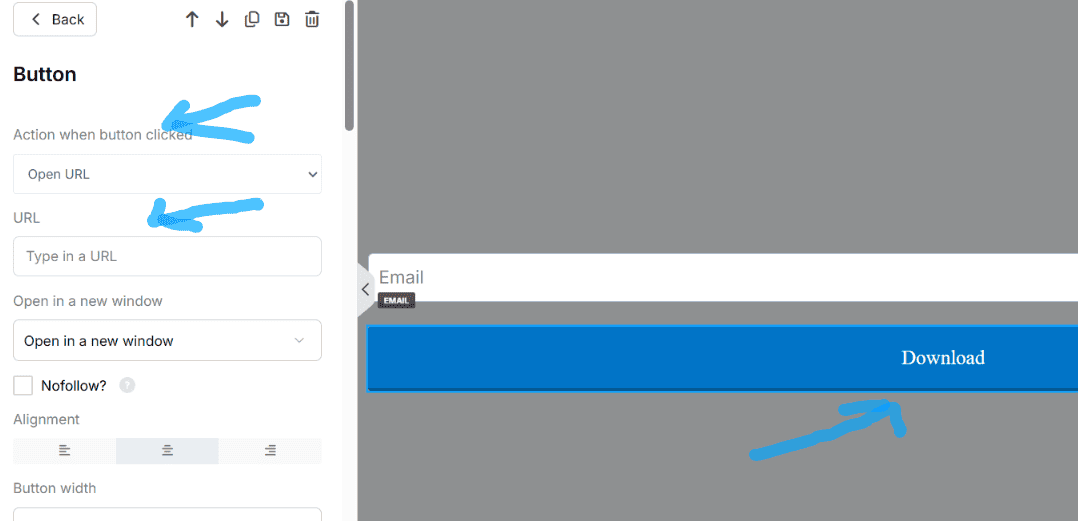
Now I did have to tweak the button. I made it much longer, removed the subheading, and changed the words to “download.”
For some strange reason, “download” improves conversions. I paid money and learned that in an expensive class.
There is a gear icon on the button, and if you click on it, you can change the text.
So my opt-in form looks simple.
Step 5: Build a Thank You Page or High-Converting Tripwire Offer
Another really cool tip is if you click on your form and hit the gear icon, there is a menu on the left.
If you click on “action,” you can choose where someone goes after then optin-in.
I recommend a custom URL.
On my custom URL, I put a tripwire. What a tripwire does is it’s a VERY low-priced offer that turns someone from a looker into a buyer.
It’s VERY powerful.
It’s like when a guy tries to kiss a girl for the first time, it’s hard. But the next time it’s easier because it’s been done before.
This tripwire will improve your sales.
I wrote a post on 9 tripwire vs lead magnet differences and how you make them easy.
Step 6: Embed Your Systeme.io Form on WordPress (or Any Blog)
Now that you created your inline form, you might be wondering how to embed it on your blog.
All you do is click on your inline form, and there is a large button that says “script.”
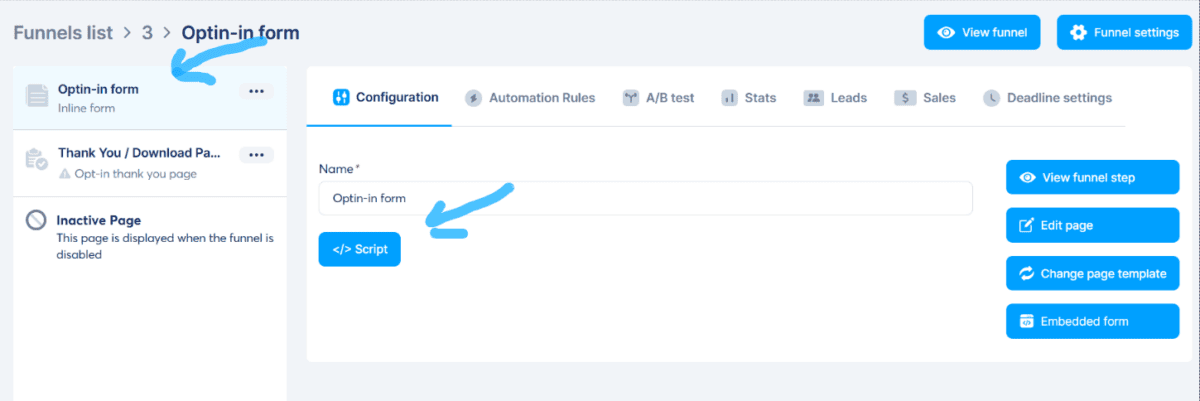
In your WordPress, just find the HTML box and copy and paste the script into the box, and it should look something like this.
Congratulations, you now have put an opt-in box on your WordPress blog. Not too bad, right?
Of course you can add more text, pictures, video, and more too.
In fact, I created a whole cheat sheet on insider secrets for creating a landing page that converts, with my promo cheat sheet on getting emails opened, clicked, and how to earn more money.
The best part is that I’m giving these cheat sheets away for FREE. It took me 15 years and thousands of dollars to learn this stuff, and I’m giving them away for FREE.
Closing: How to embed Systeme io form on a WordPress blog
I hope this post was helpful.
The best part of collecting leads is that it’s free, so there is ONLY upside.
Bye for now.